


- Posts: 786
- Thank you received: 21
3 Post Moderation Rule for New Boarders (25 Jan 2021)
New boarders will have their posts moderated - Don't worry if you cannot see your post immediately.
Portable green screen recommendations???
- Jonathan Levin
-
 Topic Author
- Offline
- Platinum Member
-

Less
More
11 Jan 2016 22:50 #72097
by Jonathan Levin
Portable green screen recommendations??? was created by Jonathan Levin
Hi everyone.
I know that this is mostly video editing, but I thought I'd ask here first if you had any thoughts on portable green screens. I was looking at this
www.bhphotovideo.com/c/product/616215-RE...Background_9x10.html
Seems to have pretty good reviews and only $70.00US. I understand all the basics of green screen shooting, but just wondering if you had any experience with these. Now when I get into keying with FCP, I will probably be searching the forums for a lot of answers.
Jonathan
I know that this is mostly video editing, but I thought I'd ask here first if you had any thoughts on portable green screens. I was looking at this
www.bhphotovideo.com/c/product/616215-RE...Background_9x10.html
Seems to have pretty good reviews and only $70.00US. I understand all the basics of green screen shooting, but just wondering if you had any experience with these. Now when I get into keying with FCP, I will probably be searching the forums for a lot of answers.
Jonathan
Please Log in to join the conversation.

12 Jan 2016 03:48 - 12 Jan 2016 11:44 #72103
by BenB
Replied by BenB on topic Portable green screen recommendations???
I have a higher priced/quality one like that which is 12x24. We love it, works great! We also use a 4 piece LED light kit with it, also. The one you link to has some great reviews, so I would assume it is nice.
- You'll need to get some clamps from the hardware store, with rubber covered jaws. Then use them to clamp the cloth to the vertical poles. This helps stretch the screen and get wrinkles out. Water sprayers or steam misters take a LONG time to get results, and are never worth the bother.
- Also get double-sided gaffers tape, to keep the cloth on the floor from slipping. Busted my ass really badly the first time we set it up. That was years ago, and we learned our lesson!
With good care, a quality muslin will last a long, long time. Her it is being set up at our local FCP users group, for a green screen class, some years ago.
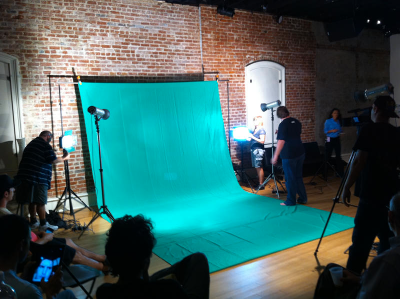
- You'll need to get some clamps from the hardware store, with rubber covered jaws. Then use them to clamp the cloth to the vertical poles. This helps stretch the screen and get wrinkles out. Water sprayers or steam misters take a LONG time to get results, and are never worth the bother.
- Also get double-sided gaffers tape, to keep the cloth on the floor from slipping. Busted my ass really badly the first time we set it up. That was years ago, and we learned our lesson!
With good care, a quality muslin will last a long, long time. Her it is being set up at our local FCP users group, for a green screen class, some years ago.
Last edit: 12 Jan 2016 11:44 by BenB. Reason: Stupid spell check...
Please Log in to join the conversation.
- damiangrady
-

- Offline
- Elite Member
-

Less
More
- Posts: 233
- Thank you received: 6
12 Jan 2016 08:02 #72109
by damiangrady
Did you mean muslin Ben?
If you're not bothered about having your green screen run on to the floor, this is a great option.
www.wexphotographic.com/buy-westcottt-ba...xno8ocfqocwwodfqwmja
We have one and can be setup in about 5 minutes.
Replied by damiangrady on topic Portable green screen recommendations???
BenB wrote: With good care, a quality muslim will last a long, long time.
Did you mean muslin Ben?
If you're not bothered about having your green screen run on to the floor, this is a great option.
www.wexphotographic.com/buy-westcottt-ba...xno8ocfqocwwodfqwmja
We have one and can be setup in about 5 minutes.
Please Log in to join the conversation.
- Karsten Schlüter
-

- Offline
- Moderator
-

Less
More
- Posts: 3790
- Thank you received: 718
12 Jan 2016 08:15 - 12 Jan 2016 08:25 #72110
by Karsten Schlüter
that B&H 'offer' is just the cloth! … does not include the mounting, which come 99$ extra.
When you don't need head2toe, but just medium shots, e.g. for interviews, I recommend one of these:
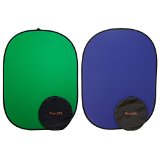
it pops up in a second, guarenteed no wrinkles, and some come in two colors, for example when your subject has some green dress. 150x200cm, ~40-60€. I own one green/blue, and another one black/white; the later, with some good lighting and manual exposure settings give infinite whites/blacks too.... Use some clamps to attach to chairs, shelf, tree....
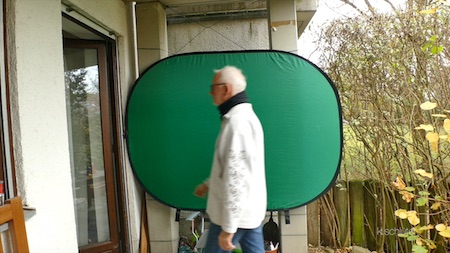
To bring it back into its tiny pocket you HAVE to watch a video, avail on YT; absolutely impossible, the human mind understands the folding, which has to be invented by some 108 years old Zen-/Oregami-master.
Replied by Karsten Schlüter on topic Portable green screen recommendations???
… thoughts on portable green screens. I was looking at this …
that B&H 'offer' is just the cloth! … does not include the mounting, which come 99$ extra.
When you don't need head2toe, but just medium shots, e.g. for interviews, I recommend one of these:
it pops up in a second, guarenteed no wrinkles, and some come in two colors, for example when your subject has some green dress. 150x200cm, ~40-60€. I own one green/blue, and another one black/white; the later, with some good lighting and manual exposure settings give infinite whites/blacks too.... Use some clamps to attach to chairs, shelf, tree....
To bring it back into its tiny pocket you HAVE to watch a video, avail on YT; absolutely impossible, the human mind understands the folding, which has to be invented by some 108 years old Zen-/Oregami-master.
Last edit: 12 Jan 2016 08:25 by Karsten Schlüter.
Please Log in to join the conversation.
12 Jan 2016 12:07 - 12 Jan 2016 12:10 #72114
by BenB
Replied by BenB on topic Portable green screen recommendations???
Just to elaborate, with my old FCP user group (which died with FCPX), we did an annual green screen seminar. We filmed one person outside as a field reporter. We filmed the second person, full body, on green screen. Then placed that second "studio anchor" inside of a virtual news studio. They actually walked around and such, camera panned, dollied, etc. Then we not only pulled the key, but did "Match Move" in Motion. Amazing what you can cover in 3 hours. Thus, we needed not just background, but flooring, too.
To take it a step further, we used the shot of the outside reporter, inside of a monitor on the virtual set. Plus placing video of New Orleans (taken from a high up hotel window) in the windows of the set.
So pulling a key, compositing, motion tracking, it got fairly elaborate. But full body, walking, was essential, and easy to do.
The green screen we have was a kit that came with the stands, and wasn't cheap, but also wasn't super expensive, from what I remember.
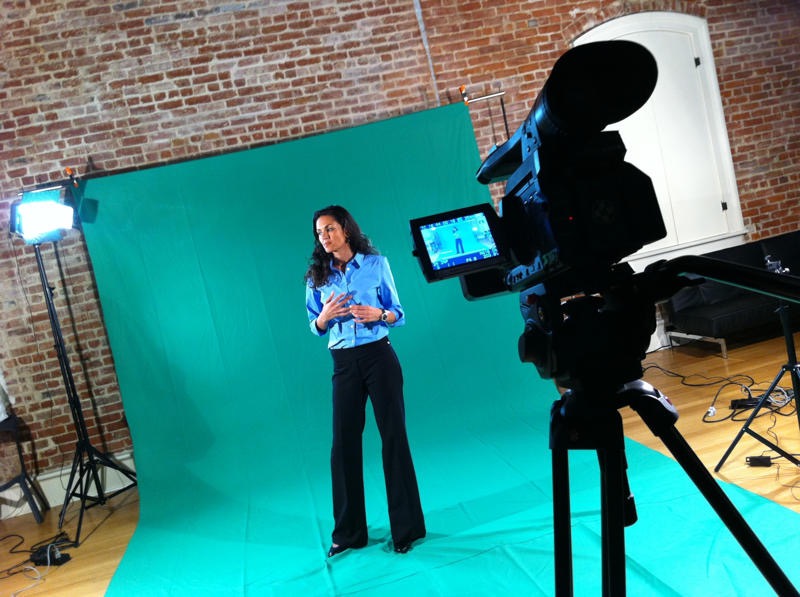
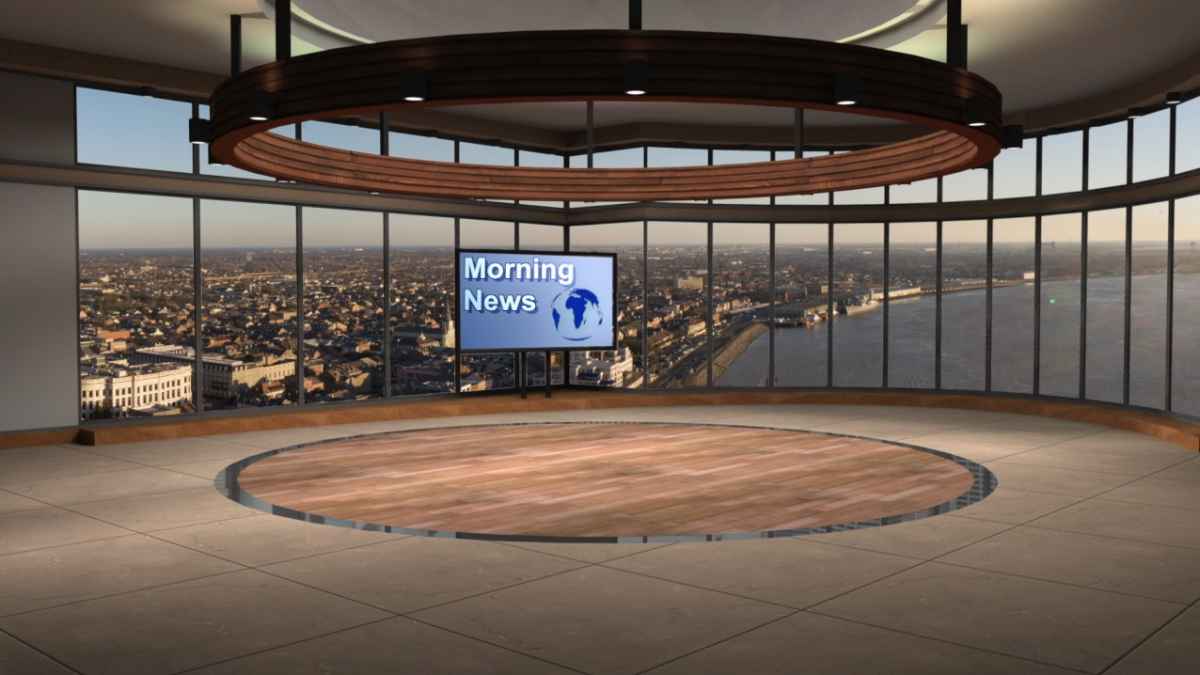
To take it a step further, we used the shot of the outside reporter, inside of a monitor on the virtual set. Plus placing video of New Orleans (taken from a high up hotel window) in the windows of the set.
So pulling a key, compositing, motion tracking, it got fairly elaborate. But full body, walking, was essential, and easy to do.
The green screen we have was a kit that came with the stands, and wasn't cheap, but also wasn't super expensive, from what I remember.
Last edit: 12 Jan 2016 12:10 by BenB.
Please Log in to join the conversation.

12 Jan 2016 16:03 #72119
by smg669
We have that exact kit. It's good. The fabric is kind of like a fleece material, so it's somewhat wrinkle resistant. Produces a good key with the right lighting. The stand configuration is good and it comes with a decent carrying case for the stand. Ben's right – get yourself some rubber-tipped clamps from the hardware store. Bring a stand along with you to pick out the right size.
Replied by smg669 on topic Portable green screen recommendations???
Jonathan Levin wrote: Hi everyone.
I know that this is mostly video editing, but I thought I'd ask here first if you had any thoughts on portable green screens. I was looking at this
www.bhphotovideo.com/c/product/616215-RE...Background_9x10.html
Seems to have pretty good reviews and only $70.00US. I understand all the basics of green screen shooting, but just wondering if you had any experience with these. Now when I get into keying with FCP, I will probably be searching the forums for a lot of answers.
Jonathan
We have that exact kit. It's good. The fabric is kind of like a fleece material, so it's somewhat wrinkle resistant. Produces a good key with the right lighting. The stand configuration is good and it comes with a decent carrying case for the stand. Ben's right – get yourself some rubber-tipped clamps from the hardware store. Bring a stand along with you to pick out the right size.
Please Log in to join the conversation.
- Jonathan Levin
-
Topic Author
- Offline
- Platinum Member
-
Less
More
- Posts: 786
- Thank you received: 21
12 Jan 2016 17:54 #72120
by Jonathan Levin
Replied by Jonathan Levin on topic Portable green screen recommendations???
Wow! Thanks everyone for your thoughts.
Spring clamps are something that there is no shortage of in my studio. :woohoo:
I had also thought about the benefit of having a two sided screen, green/blue. But didn't see to many listed. I am also guessing the absolute worst day of the year to have someone in front of green screen is St. Patricks day! Hah!
I was also looking at smaller screens but I was concerned that between lighting the background and pulling talent far enough forward to avoid spill would limit talent movement.
BenB- I will forever to remember the double-sided gaffer tape!
I'll keep looking into this a bit more before making some sort of (now) educated decision.
Thanks again guys!
JL
Spring clamps are something that there is no shortage of in my studio. :woohoo:
I had also thought about the benefit of having a two sided screen, green/blue. But didn't see to many listed. I am also guessing the absolute worst day of the year to have someone in front of green screen is St. Patricks day! Hah!
I was also looking at smaller screens but I was concerned that between lighting the background and pulling talent far enough forward to avoid spill would limit talent movement.
BenB- I will forever to remember the double-sided gaffer tape!
I'll keep looking into this a bit more before making some sort of (now) educated decision.
Thanks again guys!
JL
Please Log in to join the conversation.

12 Jan 2016 18:04 #72121
by ButchM
Replied by ButchM on topic Portable green screen recommendations???
We have been using this free standing x frame backdrop. It's great that one person can easily set it up and large enough to keep some separation from the subject and background.
8 x 8' PXB Portable X-frame Background System
8 x 8' PXB Portable X-frame Background System
Please Log in to join the conversation.
- Karsten Schlüter
-
- Offline
- Moderator
-
Less
More
- Posts: 3790
- Thank you received: 718
12 Jan 2016 18:37 #72123
by Karsten Schlüter
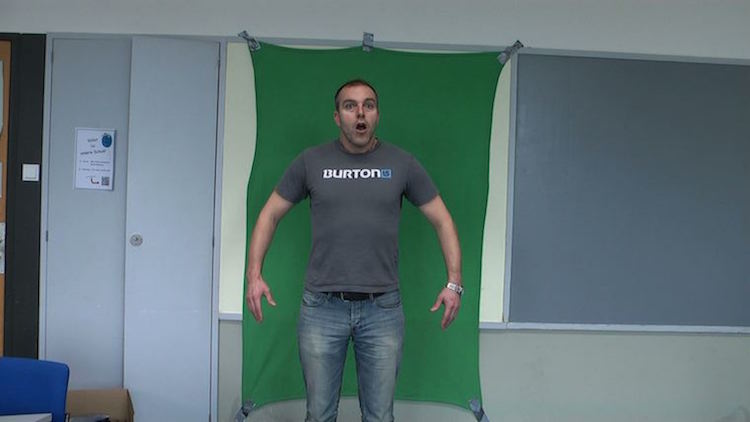
double-sided gaffa? phww, snobby! At school we staple straight to the wall:
…and that worked - our standards. the keyer in FCPX does really marvel.
blanket: 3€, tape 1€ …
:silly:
Replied by Karsten Schlüter on topic Portable green screen recommendations???
ok, amazon isn't B&H, but search for 'green screen' and half of China is making you an offer you can't regret.-… thought about the benefit of having a two sided screen, green/blue. But didn't see to many listed …
double-sided gaffa? phww, snobby! At school we staple straight to the wall:
…and that worked - our standards. the keyer in FCPX does really marvel.
blanket: 3€, tape 1€ …
:silly:
Please Log in to join the conversation.
- Jonathan Levin
-
Topic Author
- Offline
- Platinum Member
-
Less
More
- Posts: 786
- Thank you received: 21
14 Jan 2016 19:55 #72200
by Jonathan Levin
Replied by Jonathan Levin on topic Portable green screen recommendations???
Hi all.
Well I decided to go with the Westcott 130 9x10 background. Thanks for all your support!
I've just now hung it up and even right out of the box seems pretty wrinkle free. I like that it has a cross pole pocket sewn into the top so that you can slide a cross pole right in there. I then clamped both ends. I threw some lights up to illuminate the screen and used myself as a test subject. Hard to get good focus when doing a self shoot ;-}
I then did a real quick key in FCP X and it is just amazing how that works.The only thing i had to do was add two more selections (the square rectangles) to knock out what little background remained after initial key. Still trying to figure out the "Edge" selector thing. Seems to want to make everything more or less transparent. For the test, I was wearing a red/white santa hat which revealed an "edge" when against something dark.
I suspect with more careful lighting and more than a 10 minute set up, I should be able to refine this.
Jonathan
Well I decided to go with the Westcott 130 9x10 background. Thanks for all your support!
I've just now hung it up and even right out of the box seems pretty wrinkle free. I like that it has a cross pole pocket sewn into the top so that you can slide a cross pole right in there. I then clamped both ends. I threw some lights up to illuminate the screen and used myself as a test subject. Hard to get good focus when doing a self shoot ;-}
I then did a real quick key in FCP X and it is just amazing how that works.The only thing i had to do was add two more selections (the square rectangles) to knock out what little background remained after initial key. Still trying to figure out the "Edge" selector thing. Seems to want to make everything more or less transparent. For the test, I was wearing a red/white santa hat which revealed an "edge" when against something dark.
I suspect with more careful lighting and more than a 10 minute set up, I should be able to refine this.
Jonathan
Please Log in to join the conversation.
14 Jan 2016 20:11 - 14 Jan 2016 20:11 #72201
by smg669
Replied by smg669 on topic Portable green screen recommendations???
Good news. Two things:
1: The manufacturer recommends kind of balling the screen up like you're crumpling a piece of paper (and jamming in into the bag they provide) rather than folding it "linear" like you would a sheet or towel. Apparently this reduces the chance of visible wrinkles.
2: Try out and consider purchasing Hawaiki Keyer. I find it a great improvement over the built-in FCPX keyer (which is pretty good to start with).
1: The manufacturer recommends kind of balling the screen up like you're crumpling a piece of paper (and jamming in into the bag they provide) rather than folding it "linear" like you would a sheet or towel. Apparently this reduces the chance of visible wrinkles.
2: Try out and consider purchasing Hawaiki Keyer. I find it a great improvement over the built-in FCPX keyer (which is pretty good to start with).
Last edit: 14 Jan 2016 20:11 by smg669.
Please Log in to join the conversation.
- Karsten Schlüter
-
- Offline
- Moderator
-
Less
More
- Posts: 3790
- Thank you received: 718
15 Jan 2016 09:34 - 15 Jan 2016 09:39 #72210
by Karsten Schlüter
there's [strike]an app for that[/strike] a handy tool, called
Greenscreener
itunes.apple.com/us/app/green-screener/id604935529?mt=8
… got it a while ago for some much lower promotional price; using it with my iPad, you see instantly, where to apply light, where too much wrinkles etc etc....
esp. for shoestring budget productions like mine, it gives a good preview of the outcome. In many cases, you din't need the full screen perfectly lit, just behind the subject.
And another tip I got: if location allows it, stay away with cam from subject/long lense, open aperture/ND filters = shallow DoF, which 'equalizes' the background additionally, kills wrinkles optically.
Replied by Karsten Schlüter on topic Portable green screen recommendations???
… I suspect with more careful lighting and more than a 10 minute set up, I should be able to refine this.…
there's [strike]an app for that[/strike] a handy tool, called
Greenscreener
itunes.apple.com/us/app/green-screener/id604935529?mt=8
… got it a while ago for some much lower promotional price; using it with my iPad, you see instantly, where to apply light, where too much wrinkles etc etc....
esp. for shoestring budget productions like mine, it gives a good preview of the outcome. In many cases, you din't need the full screen perfectly lit, just behind the subject.
And another tip I got: if location allows it, stay away with cam from subject/long lense, open aperture/ND filters = shallow DoF, which 'equalizes' the background additionally, kills wrinkles optically.
Last edit: 15 Jan 2016 09:39 by Karsten Schlüter.
Please Log in to join the conversation.
15 Jan 2016 12:21 - 16 Jan 2016 13:11 #72227
by BenB
Replied by BenB on topic Portable green screen recommendations???
- Two clamps top, two clamps mid way down, two clamps bottom.
- Subject as far from screen is reasonably possible, min 10 feet.
- DOF to blur the screen, while sharpening focus on the talent.
- Light screen evenly.
- When keying, mask out everything you don't need FIRST, then key.
- If the FCPX keyed works, use it, save your money unless you have really bad shots and need the extra keying power. I have great results from the FCPX keyed. But it all depends on your subject matter. Blonde model with frizzy hair, you may need another keyer, but the FCPX keyed is about the best built-in keyed around. Use what works.
- Experiment a lot.
LIGHTING:
Light screen bright and even, and PLEASE use soft boxes for your screen lights.
Back light the subject with a strong light, to kill off green bouncing from screen, give a good detailed outline to the subject.
Front light the subject very nicely so they stand out in the image.
lowel.tiffen.com/edu/lesson_green_screen.html
Be aware that when you use the FCPX keyed tool to select an area to include in the key, it is creating a keyframe, so you can change that over time. Many folks don't know that it is actually a keyframe setting.
- Subject as far from screen is reasonably possible, min 10 feet.
- DOF to blur the screen, while sharpening focus on the talent.
- Light screen evenly.
- When keying, mask out everything you don't need FIRST, then key.
- If the FCPX keyed works, use it, save your money unless you have really bad shots and need the extra keying power. I have great results from the FCPX keyed. But it all depends on your subject matter. Blonde model with frizzy hair, you may need another keyer, but the FCPX keyed is about the best built-in keyed around. Use what works.
- Experiment a lot.
LIGHTING:
Light screen bright and even, and PLEASE use soft boxes for your screen lights.
Back light the subject with a strong light, to kill off green bouncing from screen, give a good detailed outline to the subject.
Front light the subject very nicely so they stand out in the image.
lowel.tiffen.com/edu/lesson_green_screen.html
Be aware that when you use the FCPX keyed tool to select an area to include in the key, it is creating a keyframe, so you can change that over time. Many folks don't know that it is actually a keyframe setting.
Last edit: 16 Jan 2016 13:11 by BenB. Reason: Clarify definition of issues
Please Log in to join the conversation.
- Jonathan Levin
-
Topic Author
- Offline
- Platinum Member
-
Less
More
- Posts: 786
- Thank you received: 21
15 Jan 2016 16:30 #72233
by Jonathan Levin
Replied by Jonathan Levin on topic Portable green screen recommendations???
Thanks guys.
SMG- I watched the Youtube video on Hawaiki Keyer. Looks like it does a great job, but also looks like there is a learning curve. LOTS of adjusters and slider!
Karsten- In my very quick test, I am trying to achieve those things.
BenB- Thanks for the pointers. I think I'd add one other thing that I've learned is to go with as high quality capture possible. In my case I'm using an Atomos Ninja Blade connected to a Nikon D800 and am capturing files using Pro Res HQ rather than 422. These files are enormous- two minutes is roughly 3GB!!!
I'd like to close out this thread and start a new thread called "Learning Green Screen and keying" and share my trials and errors in case anyone is interested.
I really love the green screen and keying thing, and I think it will be a load of fun dong some silly comedy stuff with it. A whole new world.
Jonathan
SMG- I watched the Youtube video on Hawaiki Keyer. Looks like it does a great job, but also looks like there is a learning curve. LOTS of adjusters and slider!
Karsten- In my very quick test, I am trying to achieve those things.
BenB- Thanks for the pointers. I think I'd add one other thing that I've learned is to go with as high quality capture possible. In my case I'm using an Atomos Ninja Blade connected to a Nikon D800 and am capturing files using Pro Res HQ rather than 422. These files are enormous- two minutes is roughly 3GB!!!
I'd like to close out this thread and start a new thread called "Learning Green Screen and keying" and share my trials and errors in case anyone is interested.
I really love the green screen and keying thing, and I think it will be a load of fun dong some silly comedy stuff with it. A whole new world.
Jonathan
Please Log in to join the conversation.
15 Jan 2016 20:20 #72238
by BenB
Replied by BenB on topic Portable green screen recommendations???
ProRes 422 should be fine to key with, but yes, the super highly compressed H.264 and other codecs don't have as much color data for the software to work with.
I actually have a green screen and keying video coming out next month. It is the workshop we used to do for my FCP user group, with some updates. It'll be free. I'll post in the tutorials section when it is live.
I actually have a green screen and keying video coming out next month. It is the workshop we used to do for my FCP user group, with some updates. It'll be free. I'll post in the tutorials section when it is live.
Please Log in to join the conversation.
16 Jan 2016 04:24 #72252
by ButchM
Actually, bokeh is more of a factor of the subject to background distance than camera to subject distance (using similar FOV/lens focal length of course).
Moving the subject as far forward from the background as your space allows will have more of an impact on blurring the background than moving the camera further away from the subject. Moving the camera alone, the distance required would need to be much greater than simply having the subject move a step or two forward away from the background. It's about diminishing returns when only moving the camera.
Replied by ButchM on topic Portable green screen recommendations???
"- Camera as far away from subject as reasonably possible, in an attempt to use DOF to blur screen."
Actually, bokeh is more of a factor of the subject to background distance than camera to subject distance (using similar FOV/lens focal length of course).
Moving the subject as far forward from the background as your space allows will have more of an impact on blurring the background than moving the camera further away from the subject. Moving the camera alone, the distance required would need to be much greater than simply having the subject move a step or two forward away from the background. It's about diminishing returns when only moving the camera.
Please Log in to join the conversation.
- Karsten Schlüter
-
- Offline
- Moderator
-
Less
More
- Posts: 3790
- Thank you received: 718
16 Jan 2016 07:46 #72261
by Karsten Schlüter
You're absolutely correct!
Forgot to mention in my discription, a longer focal distance reduces the DoF..... that's what I meant with my suggestion....
btw: is it meanwhile common to call any focal bluriness = 'bokeh'?
When I stumbled upon this wonderful Japanese leanword first time, it meant the look of the bluriness, e.g. defined by number of aperture blades .... or, that fun stuff with hearts, smilies by holding a stencil in front of the glas.....
Replied by Karsten Schlüter on topic Portable green screen recommendations???
ButchM wrote: ... full quote ....
You're absolutely correct!
Forgot to mention in my discription, a longer focal distance reduces the DoF..... that's what I meant with my suggestion....
btw: is it meanwhile common to call any focal bluriness = 'bokeh'?
When I stumbled upon this wonderful Japanese leanword first time, it meant the look of the bluriness, e.g. defined by number of aperture blades .... or, that fun stuff with hearts, smilies by holding a stencil in front of the glas.....
Please Log in to join the conversation.
16 Jan 2016 13:09 - 16 Jan 2016 13:11 #72267
by BenB
Replied by BenB on topic Portable green screen recommendations???
Bokeh is not DOF, don't confuse the two. DOF, all the elements involved with depth and focus. Bokeh, uses blur in general to make pleasing effects in photography (now video). DOF is used in achieving "good bokeh", but the two are not exactly the same reference. Wikipedia has a good explanation.
Yes, moving the talent from the screen lessens the green thrown back onto the talent.
DOF helps blur the screen.
Two different, although somewhat related issues.
With the proper lens, moving the camera "far" from the talent may not be necessary. Depends on the CCD/lens combination.
Updated post to reflect clarifications.
Yes, moving the talent from the screen lessens the green thrown back onto the talent.
DOF helps blur the screen.
Two different, although somewhat related issues.
With the proper lens, moving the camera "far" from the talent may not be necessary. Depends on the CCD/lens combination.
Updated post to reflect clarifications.
Last edit: 16 Jan 2016 13:11 by BenB.
Please Log in to join the conversation.
17 Jan 2016 04:23 #72280
by ButchM
Replied by ButchM on topic Portable green screen recommendations???
I'm not confused at all. Yes I understand some folks get hung up on semantics. Been dealing with the physics of light and lens technology daily for well over 40 years.
I wasn't referring to pure creamy bokeh in the colloquial sense that seems to have become popular of late ... I was only referring to the control of reducing the attention of the background.
Bottom line is, for a given field of view from the camera, moving the subject further from the background and closer to the camera has more control over DOF in relation to the background than moving the camera further from the subject would offer.
I wasn't referring to pure creamy bokeh in the colloquial sense that seems to have become popular of late ... I was only referring to the control of reducing the attention of the background.
Bottom line is, for a given field of view from the camera, moving the subject further from the background and closer to the camera has more control over DOF in relation to the background than moving the camera further from the subject would offer.
Please Log in to join the conversation.
