


- Posts: 3790
- Thank you received: 718
3 Post Moderation Rule for New Boarders (25 Jan 2021)
New boarders will have their posts moderated - Don't worry if you cannot see your post immediately.
What happens when you stick a soap bubble into concrete?
- Karsten Schlüter
-
 Topic Author
- Offline
- Moderator
-

Less
More
22 Aug 2015 13:40 - 22 Aug 2015 13:42 #67652
by Karsten Schlüter
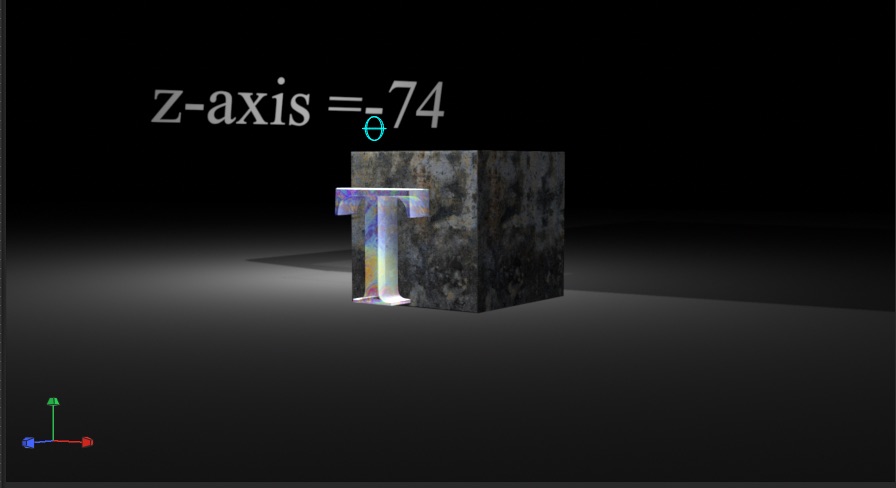
Nothing.- :silly:
OK, what did I expect? A hole, of course.
Independently where I stack the bubble, on a higher or lower layer - no hole.
Plus that - imho - weird calculation of shadows, the screenshot shows where the light is.. no ambient, ... The shadow of the cube is way to wide ....
The cube, btw, is a square, istet in the sign -list as 'BULLET OPERATOR' ... plus a ton of depth.
Nothing.- :silly:
OK, what did I expect? A hole, of course.
Independently where I stack the bubble, on a higher or lower layer - no hole.
Plus that - imho - weird calculation of shadows, the screenshot shows where the light is.. no ambient, ... The shadow of the cube is way to wide ....
The cube, btw, is a square, istet in the sign -list as 'BULLET OPERATOR' ... plus a ton of depth.
Last edit: 22 Aug 2015 13:42 by Karsten Schlüter.
Please Log in to join the conversation.


22 Aug 2015 15:24 #67654
by BenB
Replied by BenB on topic What happens when you stick a soap bubble into concrete?
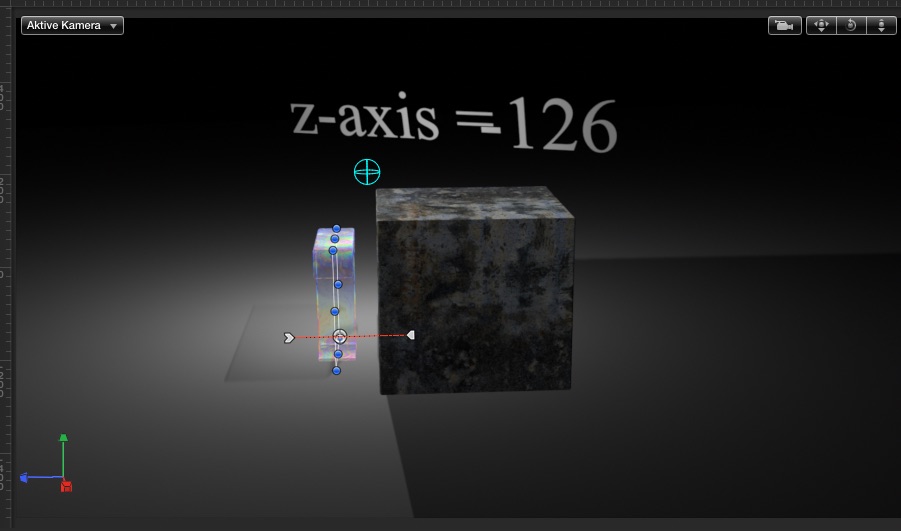
Actually, from where I see the light, it is very close to the cube, which will make a shadow with very wide perspective. Pull the spot light back, that will get more narrow. Remember that light rays from a spot light go out at angles, like spokes in a wheel. Based on what I can see in the screen shot. I'd like to see what distance and angle that light is actually at.
Please Log in to join the conversation.
- Karsten Schlüter
-
Topic Author
- Offline
- Moderator
-
Less
More
- Posts: 3790
- Thank you received: 718
22 Aug 2015 15:37 - 22 Aug 2015 15:37 #67657
by Karsten Schlüter
Replied by Karsten Schlüter on topic What happens when you stick a soap bubble into concrete?
Last edit: 22 Aug 2015 15:37 by Karsten Schlüter.
Please Log in to join the conversation.


22 Aug 2015 18:46 - 22 Aug 2015 18:50 #67662
by sc_fox
Replied by sc_fox on topic What happens when you stick a soap bubble into concrete?
Karsten -
there is a point where you can get one object to cut a hole in the surface of another.
Technique:
Both surfaces must be flat (Front, Back, or Side -- edges are tricky) and the two "connecting" surfaces must meet at exactly the same plane. The back plane of the hole cutter should have its opacity turned down (which limits its Surface Substance to those that support some form of opacity).
The video above shows a T character with the Soap Bubble material; a Square back edge touching the surface of the cube (which I set to Travertine so that the internal details can be seen). I also put a Point Light inside the cube to help illuminate the internal surfaces. The camera movement is a simple Sweep and the camera is Tilted up 9° in order to discern the inside upper corners of the cube.
Notes:
HTH
there is a point where you can get one object to cut a hole in the surface of another.
Technique:
Both surfaces must be flat (Front, Back, or Side -- edges are tricky) and the two "connecting" surfaces must meet at exactly the same plane. The back plane of the hole cutter should have its opacity turned down (which limits its Surface Substance to those that support some form of opacity).
The video above shows a T character with the Soap Bubble material; a Square back edge touching the surface of the cube (which I set to Travertine so that the internal details can be seen). I also put a Point Light inside the cube to help illuminate the internal surfaces. The camera movement is a simple Sweep and the camera is Tilted up 9° in order to discern the inside upper corners of the cube.
Notes:
- it helps a great deal to set the Depth Direction of the hole cutter to forward.
- the camera angle (Y) must be within a certain range. At the long angles (+/- ~90°, the cube will appear solid again
HTH
Last edit: 22 Aug 2015 18:50 by sc_fox.
Please Log in to join the conversation.
- Karsten Schlüter
-
Topic Author
- Offline
- Moderator
-
Less
More
- Posts: 3790
- Thank you received: 718
23 Aug 2015 06:57 #67666
by Karsten Schlüter
Replied by Karsten Schlüter on topic What happens when you stick a soap bubble into concrete?
Thanks, sc_fox, for participating in my lil' discovery tour thru the 3D-ish of Motion ... 
You lost me here - "… its (the back plane) opacity turned down...? Hu?
I can set the opacity of the 6 surfaces individually? How? or, perhaps Where?
Digged thru all settings… no, can not find.
While enacting your set (and fail to do so), I notice another weird effect:
You told me, to set a light inside the cube (when it's hollow, I should call it a box :lol: ).
Have a look, what a light inside a box has an effect to overall scenery:
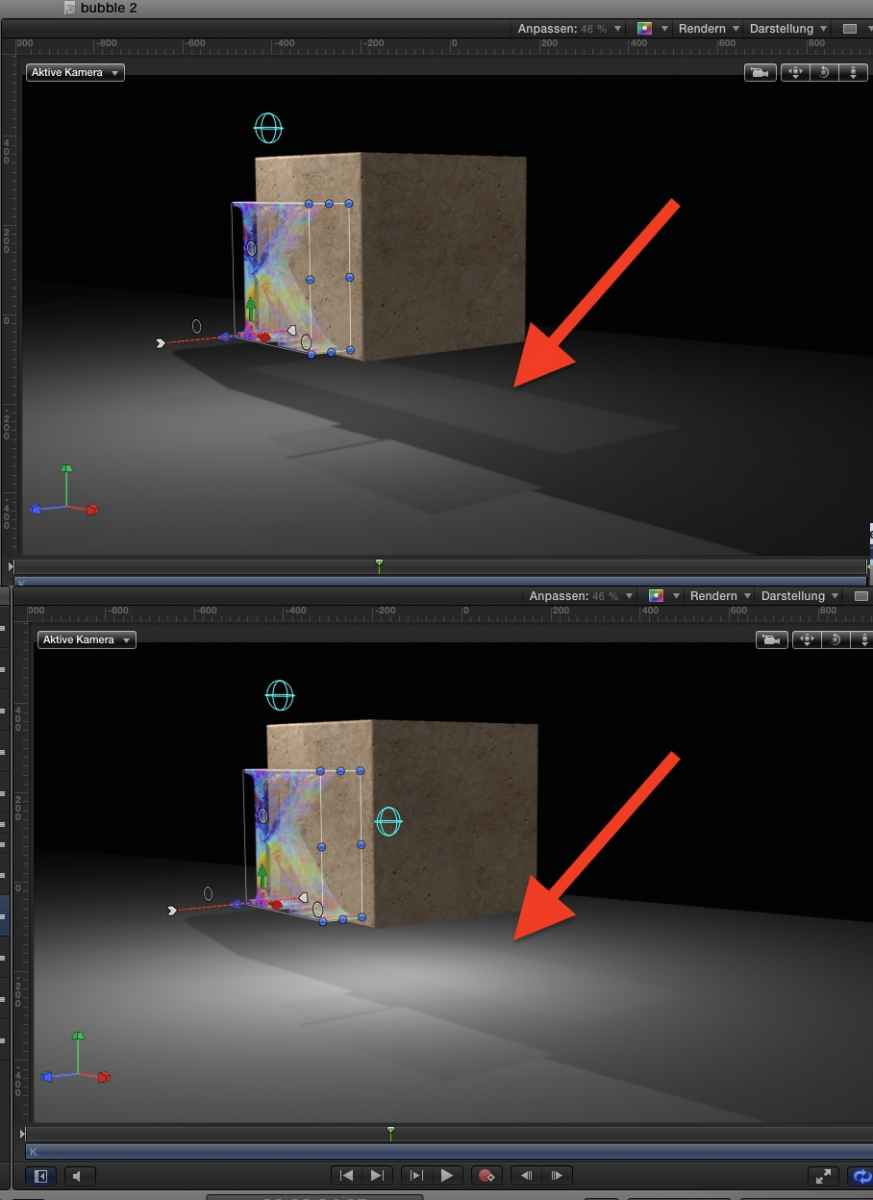
… somehow, the light manages to 'escape' from the box!! :woohoo:
... I own mObject… I guess, I should invest my spare 'hobby time' more on that app, than twisting a text-generator ...
sc_fox wrote: …..The back plane of the hole cutter should have its opacity turned down …...
You lost me here - "… its (the back plane) opacity turned down...? Hu?
I can set the opacity of the 6 surfaces individually? How? or, perhaps Where?
Digged thru all settings… no, can not find.
While enacting your set (and fail to do so), I notice another weird effect:
You told me, to set a light inside the cube (when it's hollow, I should call it a box :lol: ).
Have a look, what a light inside a box has an effect to overall scenery:
… somehow, the light manages to 'escape' from the box!! :woohoo:
... I own mObject… I guess, I should invest my spare 'hobby time' more on that app, than twisting a text-generator ...
Please Log in to join the conversation.
23 Aug 2015 08:17 #67667
by sc_fox
Replied by sc_fox on topic What happens when you stick a soap bubble into concrete?
In the Text Appearance inspector, the layer that says "Material" is a drop down menu. Click on Single and select Multiple. You'll be presented with the option to change the Front Sides and Back as well as the Front and Back Edges.
You can change properties to multiple faces at a time by selecting a face and then clicking on the small link icons below near the bottom to link other faces to the side you're editing. Also, you can change a face by selecting one of the faces you want to copy then clicking on the link icon of the face you want to change.
Each face in a Multiple Material can have all of its own properties like Paint, Finish, Distress... etc...
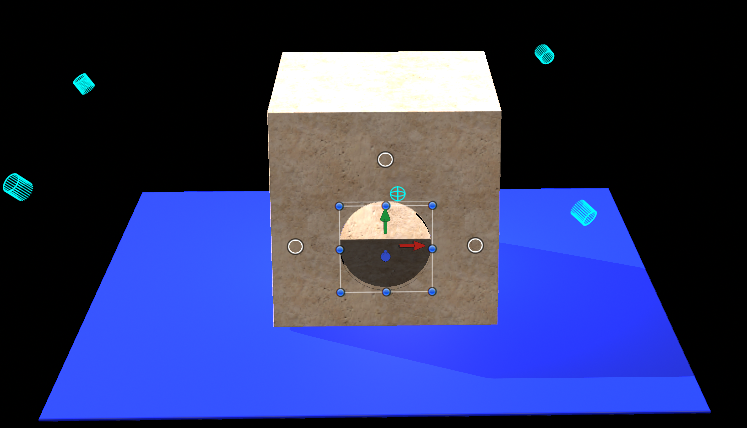
As for the light leak: are you using a 2D color solid for the floor? if you change that to a 3D surface (use the same character you used for the cube, 0 depth, square Edges and run the size way up or use the Weight to make it a larger area.) The light from inside the cube will not leak.
You can change properties to multiple faces at a time by selecting a face and then clicking on the small link icons below near the bottom to link other faces to the side you're editing. Also, you can change a face by selecting one of the faces you want to copy then clicking on the link icon of the face you want to change.
Each face in a Multiple Material can have all of its own properties like Paint, Finish, Distress... etc...
As for the light leak: are you using a 2D color solid for the floor? if you change that to a 3D surface (use the same character you used for the cube, 0 depth, square Edges and run the size way up or use the Weight to make it a larger area.) The light from inside the cube will not leak.
Please Log in to join the conversation.
- Karsten Schlüter
-
Topic Author
- Offline
- Moderator
-
Less
More
- Posts: 3790
- Thank you received: 718
23 Aug 2015 12:02 - 23 Aug 2015 12:09 #67668
by Karsten Schlüter
Replied by Karsten Schlüter on topic What happens when you stick a soap bubble into concrete?
sc_fx, again many thanks supporting me...
But, my perception in this issue is: I lack many, too many basics of this app. Too much trial'n error, where and howto switch-on shadows, too much trial'n error to understand the coordinate system of M5, etc etc.
I started with a clean new project, following your advices (never heard of, a plane needs to be 3D…) word by word... no luck, my latest attemp to follow your advice gave the same, 'wrong' effect:
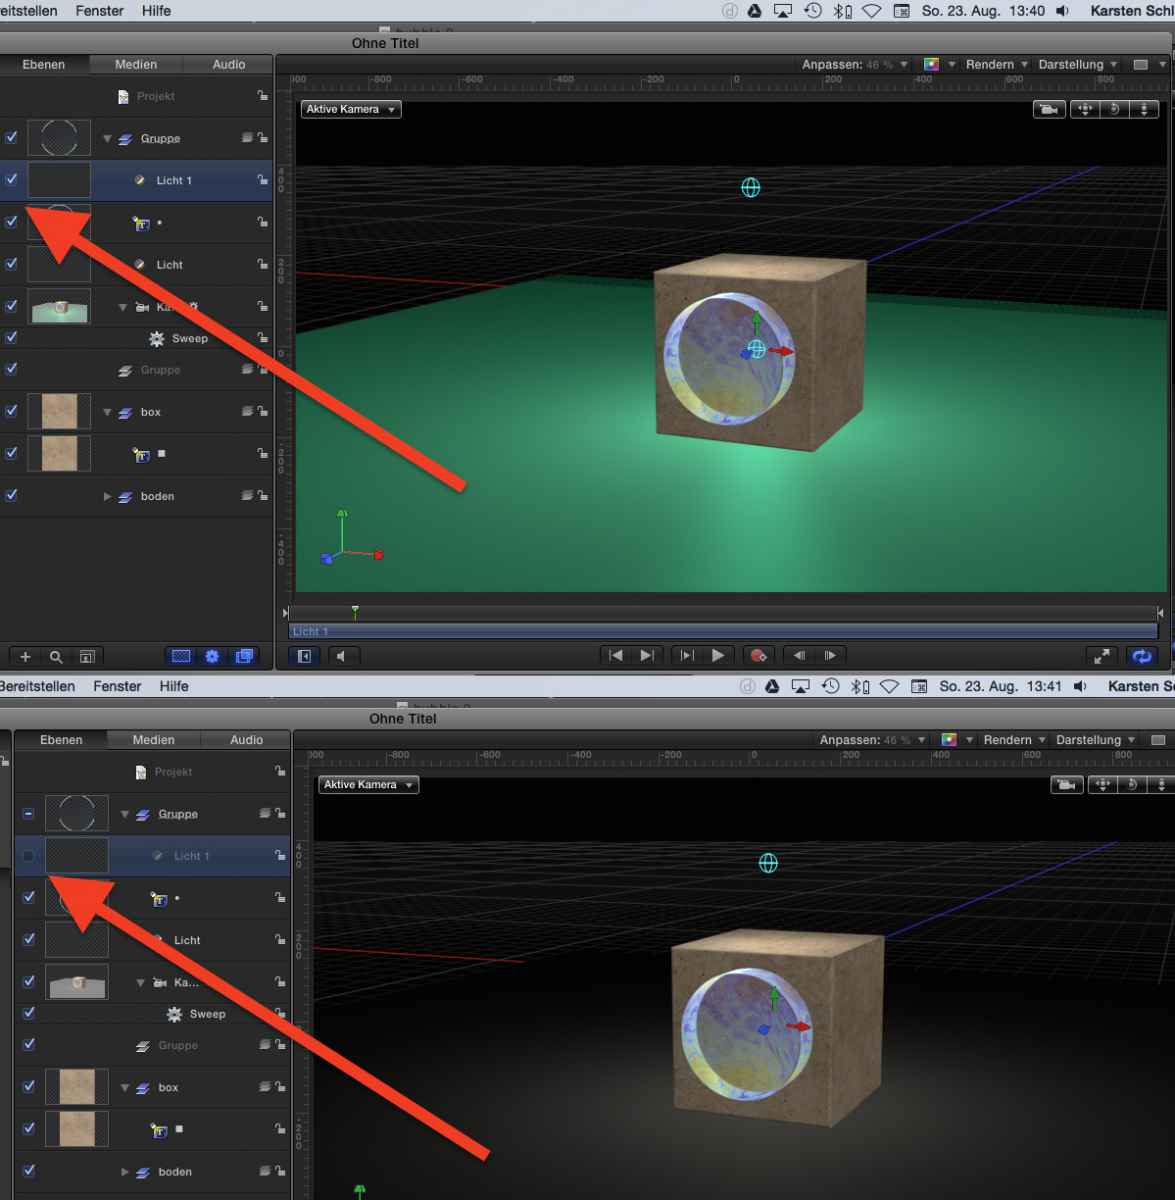
The light in the box (to make it obvious, I made it green) when switched on, has an effect on the plane under the box .... :S
.... give me another 6 months to learn the essentials... I'll be back!.. :lol:
But, my perception in this issue is: I lack many, too many basics of this app. Too much trial'n error, where and howto switch-on shadows, too much trial'n error to understand the coordinate system of M5, etc etc.
I started with a clean new project, following your advices (never heard of, a plane needs to be 3D…) word by word... no luck, my latest attemp to follow your advice gave the same, 'wrong' effect:
The light in the box (to make it obvious, I made it green) when switched on, has an effect on the plane under the box .... :S
.... give me another 6 months to learn the essentials... I'll be back!.. :lol:
Last edit: 23 Aug 2015 12:09 by Karsten Schlüter.
Please Log in to join the conversation.
